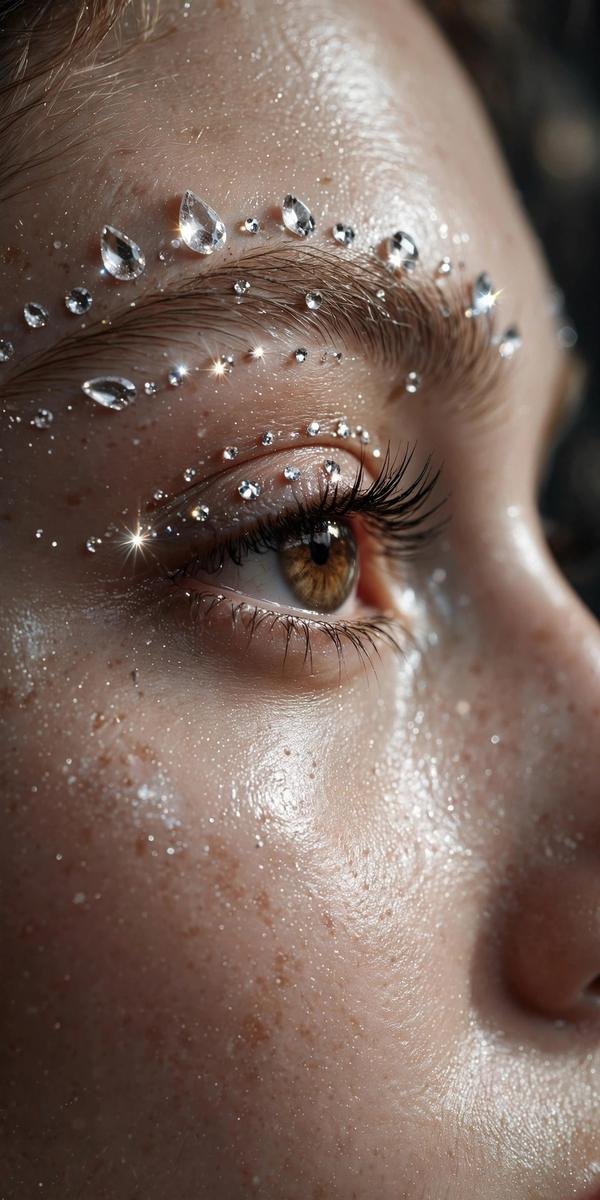
Face gems have left the festival field and entered the everyday beauty vocabulary. What started as a Coachella-daydream — tiny crystals scattered across cheekbones — has evolved into something far more precise in 2026: face gems as deliberate eye jewelry. Crystal placements along the brow bone, the inner corner, and the lash line are now showing up on brides, editorial shoots, and red carpets, turning the eyes into the focal point with almost no shadow needed underneath. The effect is instant dimension — light bouncing off the face from a dozen tiny points, making eyes look brighter, more awake, and more photographed.
The appeal is also practical. Gems are quicker than a cut crease, cheaper than a lash appointment, and fully removable in a minute. But the difference between a look that reads “expensive editorial” and one that reads “craft store” comes down to placement, adhesive, and restraint. Below are nine crystal looks, each built on real technique — how to prep the skin, what adhesive to use, which gem sizes and colors flatter which eye shapes — so the sparkle lands exactly where you want it.
1. The Classic Inner-Corner Sparkle
The most wearable entry point in the crystal trend: a small cluster of tiny crystals tucked into the inner corner of each eye. A single 2mm crystal, or three micro-gems in a tight triangle, catches light every time you blink and creates the illusion of brighter, more open eyes. It is the gem equivalent of inner-corner highlighter — but with ten times the reflectivity. This look works with bare lids or a full face of makeup, which is exactly why makeup artists use it constantly on shoots.
Press the gem onto a dab of lash glue with tweezers, or use self-adhesive gems — the inner corner is curved, so small gems sit more securely than large ones. Keep the rest of the eye simple: groomed brows, one coat of mascara, clean skin. Crystal-clear or opal gems suit everyone here; avoid oversized stones, which look costume-like in such a delicate spot. The inner-corner sparkle photographs beautifully and suits every eye shape, including close-set eyes, where it creates an illusion of space.
2. Brow-Bone Crystal Dusting
A scattered line of small crystals following the arch of the brow bone, from the inner brow to the outer third. The effect is subtle from straight on and luminous in profile — like the brow bone is catching ambient light all on its own. It gives structure and lift to the whole eye area without any dark shadow, making it a favorite for brides and anyone who wants glamour without heaviness. Pair it with softly defined brows and a sheer wash of neutral shadow underneath so the crystals have a clean, blended canvas to sit on.
Use gems between 2 and 3mm, spaced slightly apart rather than touching, so the arc reads as a constellation instead of a strip. Press each gem into a thin layer of cosmetic adhesive — a latex-free lash glue or a dedicated gem glue pen gives the best hold through sweat and long events. Apply the crystals after shadow but before setting spray, and let the adhesive go fully tacky before placing so nothing slides. Crystal-clear gems are classic; iridescent or holographic gems add a modern, prismatic edge. Remove by softening the glue with an oil-based cleanser, never by pulling.
3. The Crystal Liner
Replace winged eyeliner with a precise row of small crystals tracing the upper lash line. It delivers the definition of liner with the drama of jewelry — a graphic, editorial statement that reads beautifully in photos and from a distance. The crystal liner works on lids that are bare, smoked, or neutral, and it stays visible on hooded eyes where black liner can disappear into the fold. It is the look that gets screenshotted from runways and music videos most often.
Uniformity is everything here: use same-sized gems (2.5mm works well) placed edge to edge in a straight row, starting from the inner third of the lash line to the outer corner. Map the line first with a thin pencil so placement stays symmetrical on both eyes. A precision lash glue with a fine applicator tip beats thick tubes for this — dot a thin line of adhesive, wait until tacky, then set each crystal with tweezers. Keep mascara light so the lashes do not compete with the gem line.
4. Lower-Lash Line Sparkle
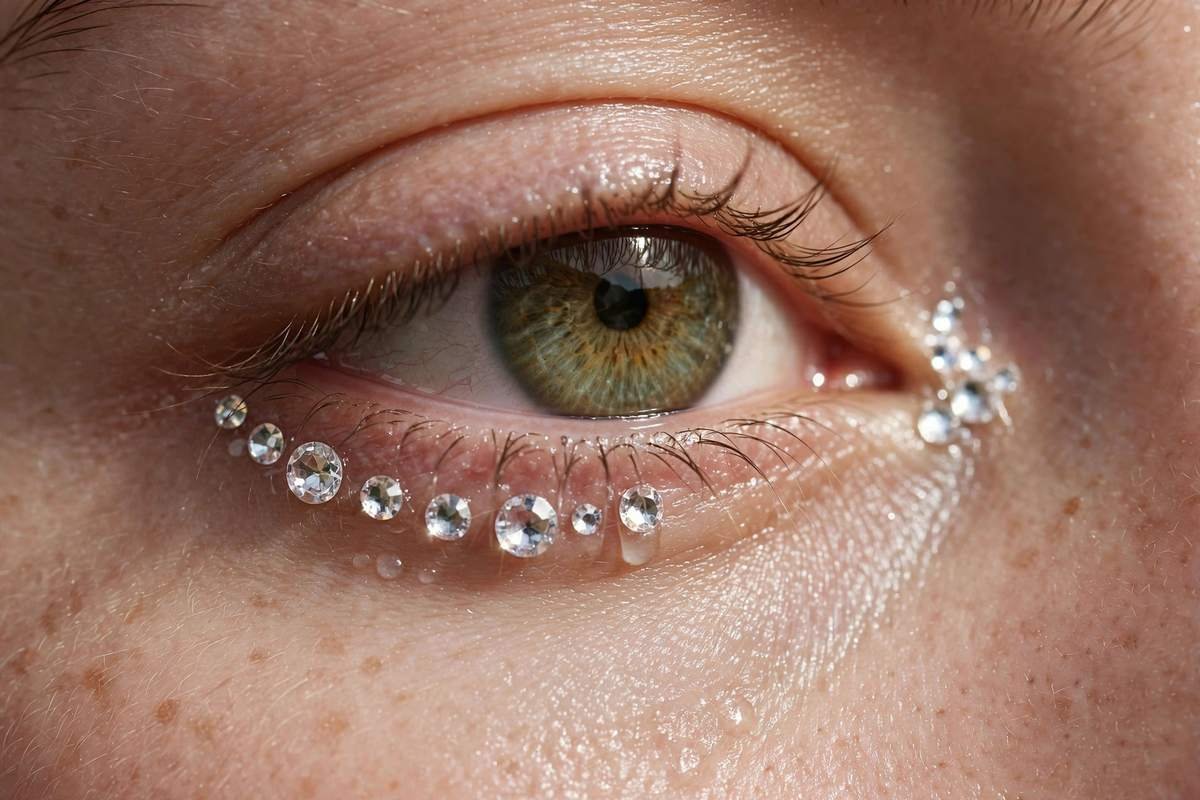
Crystals dotted along the lower lash line give a doe-eyed, dewy brightness that makes eyes look larger and more luminous. A sparse scattering — five or six tiny gems spaced along the outer two-thirds of the lower lashes — creates a twinkling effect that reads as youthful and fresh. This is the placement brides ask for most after the brow bone, because it photographs as a gentle glint rather than obvious decoration, and it flatters every eye shape without changing the eye’s natural proportions.
Keep gems small (1.5 to 2mm) and well spaced so the lower lid does not look cluttered; too many stones here read as heavy. Apply a light layer of concealer and set it before placing gems, since the lower lash area moves and creases — dry, set skin holds adhesive far better. Use the smallest dab of lash glue per gem and press gently with a damp cotton swab rather than tweezers to avoid poking the waterline area. Champagne and pale opal crystals are the most flattering color story for daytime and weddings; crystal-clear or AB-coated gems take it into evening territory.
5. The Opal Fairy Wing
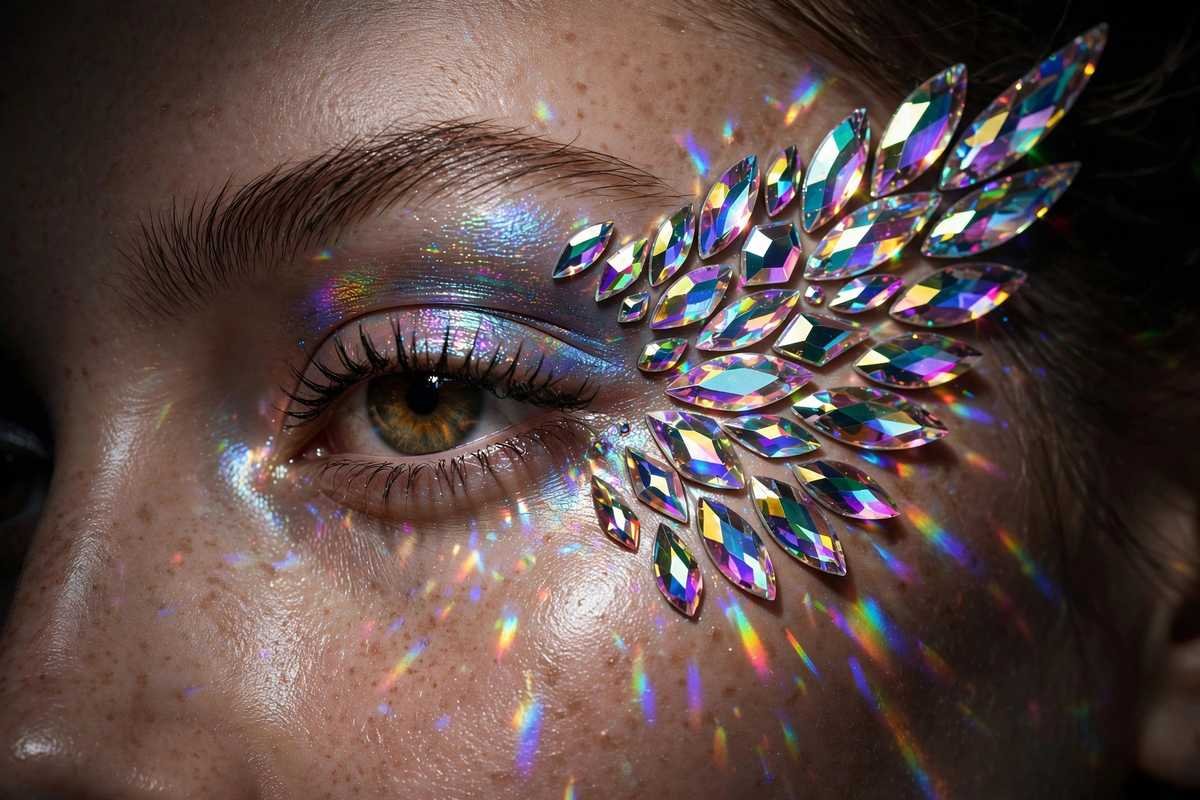
Opal and iridescent gems arranged in a winged pattern that sweeps from the outer corner toward the temple — the fantasy editorial look of the moment. The opal finish shifts between pink, green, and blue depending on the light, so the wing appears to move even when you are still. This is the festival and photoshoot centerpiece: bold, dreamy, and unapologetic. It works best with the rest of the face kept clean and luminous so the wing is unmistakably the star.
Start the wing where a traditional winged liner would end, then place graduated gems — 3mm at the base near the outer corner, shrinking to 1.5mm at the temple tip — so the wing tapers naturally. Because the temple area flexes with facial expressions, use a flexible cosmetic adhesive rather than stiff lash glue here, and press each gem firmly for a few seconds. Blend a soft wash of pearlescent shadow underneath in the same color family to make the wing feel integrated rather than stuck on. Remove with an oil cleanser and gentle circular motions.
6. Champagne Bridal Sparkle
The wedding look. Warm champagne crystals scattered above the crease and along the brow bone, paired with soft gold shadow and feathered lashes. The champagne color story flatters warm and neutral undertones and every skin depth, reading as radiance rather than decoration. It is glamorous in a way that still looks like the wearer on the best day — luminous, romantic, and designed to survive tears, hugs, and a long night of dancing.
Prep matters more here than anywhere: prime the lids, complete the full eye look, set lightly with powder, then place the gems so the adhesive bonds to set makeup rather than bare oily skin. A long-wear lash glue or waterproof cosmetic adhesive is essential for a full wedding day. Scatter sizes — mix 2mm and 3mm champagne crystals — for a natural, starlit effect rather than a rigid pattern. Concentrate the cluster toward the outer half of the eye for a lifting effect. Keep a few spare gems and a glue pen in the clutch or with the makeup artist for touch-ups between the ceremony and the reception.
7. The Holographic Temple Arc
Holographic gems in an arc that starts at the outer corner, sweeps through the crease’s end, and curves toward the temple — the most editorial placement on this list. The holographic finish throws rainbow reflections that shift with every head turn, giving the eye a prismatic halo effect. It is the look stylists reach for when a shoot needs one unforgettable detail, and it translates surprisingly well to concerts, parties, and anywhere with dramatic lighting. Understated it is not — and that is the point.
Plan the arc before a single gem goes down: sketch it with a light pencil so both eyes match, because asymmetry shows immediately with reflective gems. Use a flexible mix of gem sizes — larger 3 to 4mm stones as the arc’s anchor points, smaller ones filling between — and a medium-strength cosmetic adhesive that holds through movement but releases with oil cleanser later. Keep shadow underneath sheer and cool-toned (soft silver or pale gray) so the holographic reflections are not fighting warm pigment. Finish the rest of the face minimal — luminous skin, nude lip — and let the arc carry the entire look.

8. The Full Crystal Lid
The maximalist statement: the entire mobile lid covered in a mosaic of small crystals, like a jeweled eyeshadow. Up close it reads as intricate craftsmanship; from a distance it reads as pure light. This is the runway and campaign look — the one that stops a scroll — and while it is the most time-consuming placement on this list, it is also the most transformative. Under it, keep shadow minimal: the crystals are the pigment now.
Work in sections, starting from the inner corner and moving outward, using 2 to 2.5mm crystals in a tight honeycomb or rowed pattern. A thin layer of lash glue across one section at a time prevents the adhesive drying before you finish placing. Crystal-clear gems give a diamond-dust effect; mixing in a few opal or AB-coated gems adds depth and stops the lid from looking flat. This look is heavy, so counterbalance with strong brows and defined lashes — otherwise the eyes can look swallowed by the sparkle. Budget fifteen to twenty minutes per eye.
9. The Monochrome Gem Moment
Crystals in a single color family — all rose-pink, all emerald, all sapphire — placed across lids, brow bones, and inner corners in one coordinated composition. The monochrome approach is what separates a considered look from random sparkle: the unified color story makes even generous gem placement read as intentional and editorial. A cool-toned monochrome (silver, ice blue, lilac) suits evening and winter; warm monochrome (rose gold, amber, bronze) flatters golden-hour light and warm undertones.
Choose one gem color and vary only the size — this keeps the look cohesive while adding dimension. Lay the design out on the back of your hand first to check the color balance before committing to the face. Coordinate the gem color with the shadow underneath: a sheer wash of the same color family beneath the crystals unifies the whole eye. Lash glue works for the lid; switch to a flexible adhesive for brow-bone and temple placements that move with expression. For longevity, finish with a light mist of setting spray — avoid the gems’ reflective faces so they do not dull.
Final Thoughts
Face-gem eye makeup works in 2026 because the technique finally caught up with the fantasy — the right adhesives, the right sizes, and placement that flatters the eye’s anatomy instead of fighting it. Across all nine looks, the rules stay constant: prep and set the skin first, let adhesive go tacky before placing, keep gems small where skin curves and moves, and match the color story to the occasion and your undertone.
For first-timers, start with the inner-corner sparkle or the champagne bridal scatter — the most forgiving looks on this list. And removal deserves as much care as application: soak a cotton pad in oil-based cleanser or micellar water, hold it over the gems for thirty seconds to dissolve the adhesive, then let them slide off. Never pull or scratch gems off dry skin — the sparkle should be the memorable part of the night, not the irritation the morning after.



Leave a Reply